DragonsWeb

Welcome to my blog. Please take a look around and enjoy yourself. I hope my work will give you pleasure and inspiration, but please be kind and don't use any of it as your own.

When you have looked, why not leave me a comment, as I value what followers and visitors have to say.


Then pop over to DragonsDream Tag It On and DragonsDarkerSide

Wednesday, 14 September 2011

WOYWW #119 - Tim Holtz Birdcage Swap Results

It happened, and without too much of a hitch!! One poorly person, and one person away because of a new-born, but otherwise I have not heard of any problems... I expect not everyone has received their birdy cage yet, as many were coming from overseas, but hopefully they will all show and tell about the one they made, here today, via the linky thingy at the bottom of this post... They could be tags or postcard sized. So here is the one I made, and sent to Hels...

 Yup!! Guess what??? It's a tag!!! Hels VERY kindly called me the "Queen of Tags" and said I do the most AMAZING taggy art, on her blog!!! WOO I was SO pleased... but, you are now asking yourself, but where is the birdy cage, arn't you?? Well, you see, the truth is I CHEATED!!

 Yes, I made a tag, but also made a 6"x4" postcard, so I could fill up all the spaces with the ideas I had for this piece!! So above, and below, are both pieces in process of being painted, ready for thier embellies...

 I used some acrylic paint in brown first, then a layer of pva glue with another layer of paint on top, then dried to get these fabby crackles. The thicker the glue, the bigger the cracks so I went for a mixture...

 I had several ickle birdies to make and here are two of them - the larger one was for the front, as you can see below...

 So how did it work with two pieces then?? Well, I decided to fasten them together with some hinges. I would have liked to have real hinges, but don't have any just now, so I made them by cutting a TH die top on each end of the grunge paper, then painted...

 So this is how it stands up to be displayed. It was great having 4 sides to deorate!!

 Here is the inside, showing the bird letters, which were TH alphabet pieces fixed to the grunge blocks, painted and distressed...

 I used rub 'n buff and Viva Inca Gold pastes to colour over the paint...


 Voila, finally, my birdy cage, complete with ickle bird, who sits outside, looking at the bits and pieces... the "lock" diamond is a Vintaj filigree, distressed with paint and paste. Hung from the holes is a chain with a pen nib, bead, metal disc, light bulb and tiny penny farthing!!  At the top is a hitch fastener for the cage to hang from. I also added a spinner and gears and a pocket watch I made from an idea-ology type tag... the 300 is to commemorate my 300 blog posts to that date...

Just a small view to show the key, lock and metal tag on the right hand side... I put the tag through a folder, then shone it up... well thre HAD to be a tag somewhere, eh??
 And now for the back of the project... one of the ickle birdies has sat on the clock hands, mounted on to a large rosette, escaping from his cage beneath!!


 I embossed with several different powders, as on the large one... the green is a wonderful verdigis one I have had forever, it's wonderful stuff... oo I do love embossing... I pressed a stamp into the birdies whilst they were still hot, to make the illusion of feathers... I think embossing powder is like using alchemy...

Hurrah, you shout, this is the end... well yes, this is the last photo of the piece. I think I have showed you most of it... and I hope you liked it. I LOVED it and Hels tells me she loves it too!! Most people who have contacted me say they really loved doing the swap, and want to do another one, so I shall organise that soon... not sure whether to do another birdy cage or to do a different die?? Let me know what you think, if you are interested at all. I would like to put this piece into a challenge or maybe two, so I have chosen

Shopping our Weekly Stash - vintage/distressed/shabby
Make it Monday - anything goes
Gingersnap Creations - crimping/pleating

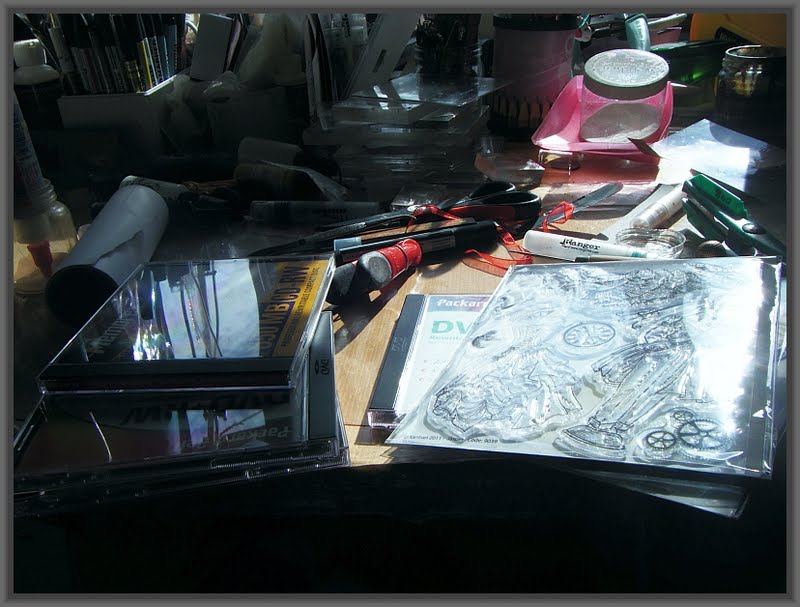
Now for the real reason for WOYWW - chez Julia (who joined the swap, so that was gudd!!) there is an admirable opportunity to snoop around others' workspaces and stuff, so hop over and take a look... below is my disreputable desk!!!


However, it's full of good intentions, as I am sorting my stamps into disc cases... found LOADS in Pete's cupboard, so I am turfing out the discs, and popping some stamps in... this set on the left is from the ineffable Wendie Rhodes in conjunction with Kanban... so glad to see her back!!

So that really IS the end... Thanks for coming to look and getting here, because it has been a marathon!! I am thrilled that so many of you visit me these days and I look forward to seeing your work too...
Love and Light
Frankie
xx

Simon Says and TIO # 96

 Wanda has chosen to challenge us to show some fashion at TIO this week, and Simon Says Stamp and Show some steampunk, so I just had to conflate the two... especially as I just had some new stamps from Wendie Rhodes at Kanban Crafts. So my tag is on the right, attached to a frame of the tray...


 Wendie's images are very steampunk fashionista... I just added some metal elements to dress them up a little, chains. a key, roses, necklace etc...

 I made a terrific pair of backgrounds, for the tray and for the tag, by stamping layers, as always and embossing in clear ep...

 I also made some more of my roses!! well Lynne's really but I have adopted them as my own!! I LOVE LOVE LOVE making them, and they look so good with these metal twists... I have been asked to show how I make these with my twisty thing, and I will, soon...

 Here they are close up and personal... don't you think they are yummyiness??? and they go so well with the TH gears...

 Here you can see the paper I  made  and the ickle pocket watch... . nice Martha Stewart flutterbies too... also, some more gears and cogs...


So here is my tag for TIO #96 as part of my project for Simon Says Stamp and Show some Steampunk... hope it goes down well in both challenges, and any others I might find where I can slot it in!!! Thanks for looking and commenting... I am thrilled by the reponses I am getting to my work these days...
Love and light
Frankie
xx

I also want to enter this piece into the following challenges
Fashionable Stamping Challenges - tag
Anything goes Challenge -

Saturday, 10 September 2011

Art Journaling Page Debutante!!!

So, she said she wasn't going to do this, didn't she???
But she has gone and started a journal!!!

I know I have been saying I would not start an art journal, but the temptation to play got the better of me, folks!!. This is NOT the first page to be started, it is the second in the book - which I made myself, incidentally, from cut down A3 watercolour paper, and bound using my Bind it All FOR THE VERY FIRST TIME!! Yey!!! Cynthia (aka Rainbow Lady) will tell you I have had that beastie almost as long as I have know her, and NEVER had the gumption, nouse or wit to use it before!!!

 Well this was the page at an intermediate stage - thought I had taken a piccie before this one, but no!! I began by drizzling pink and orange acrylic paint randomly on the page, and smoochy-spreading with an old RAC card!! I then dried it and dribbled a bit more - the paint, not me, you understand!!! The odd red dots you can spy are my fired brick distress stain, which dried with a shine on the acrylic base... very interesting... I also did a little direct to paper with a multicoloured, shiny ink pad...

This shot looks different colours, but it's just the lighting, when the sun's not in my craftly'oom... the difference really is down the centre, where I hated the white join, so I took my inktense pencils and scribbled and washed with a water brush... Then the tearing began. I recently could not resist some oriental papers Dawn was showing - might have been last at QVC - well they are beautiful, but just had to be used - it's ok, she has two other sheets in the pack!!  One is patterned and the other has faint oriental script on it. The stamped script is a true old favourite called plum blossom from Stamp Addicts.

 Next it was even MORE of a wrench to cut into a sheet or two of my Kodomo, 12"x12" papers, bought for me moons ago by my lovely daughter, Miranda... The lady was the main image to use, but I cut up the patterns round her for a "Teecha Moore" border. I also dotted some of the flowers around...

 This is my mantra - "Keep Your Balance" but I am finding it very hard with all that is going on with my mum... so I thought I should remind myself, on my debutante page... oriental is all about balance, so it seemed fitting... I don't yet have any large alpha sets of stamps, so I used my TH die, cut out of black card... I think it works...

 So, here is one of those blousey butterflies, up close and personal... I saw Hels use it a long time ago and HAD to have it - great saleswomanship there, darlin!! - I think it is by Jo Capper Sandon for Stampotique - oh my, there are SOOO many of her stamps I MUST have... I stamped and embossed with black archival and clear ep - well it would be rude not to now, cos she always does folks!!! - then scribbled inside the images with my inktense pencils and Lyra crayons, wonderful for this kind of work... my waterbrush smooched the colour around, making the images pop, but stay strangely semi-transluscent... How could I have refrained from playing like this for so long, silly ole me!!!!!!!

 There are other ickle flutterbies knocking around, and the JCS one here is stamped separately and cut out.
To follow, are some more detail shots showing the collage and stamping, and the JCS butterflies up close again, just cuz!!!


So there you have it - my first ever finished page. I am lovin it actually - and she's not at ALL big-headed folks!! - it's a long time since I did something so purely and blatently oriental, but it is STILL a great GREAT favourite of mine, and what I was originally known for - hence the name and the blog design and music ... which seems to soothe and please a great many people, I am told!!

Well, that was a marathon, but I hope you enjoyed my journey, and will pass a comment, as usual, cos that's what it is all about - sharing and caring... Thanks for looking. I am for my bed now, perchance to sleep, let alone dream!!!
Love and Light
Frankie
xx

I would like to share this at
Stamp Something - anything goes, cos they are closing... :(

Friday, 9 September 2011

Stampman DT Piece - Monochrome +1 "Lost in Time"

Wanted to do something different this time... you know how you sometimes get stuck in the mud, and always seem to make the same sort of thing?? Ok, maybe YOU don't but I do... so I went for my melting pot - inspired by Jennie at The Artistic Stamper, who has made a fabulous melty tag+butterfly, and entered in to TIO... well it IS very RED!!! I used some black UTEE and my faces mould, and poured into these three faces - they are a bit odd looking eh??

 I smooched them with purple Viva Gold paste, to show their features and wrinkles... The background is a mixture of dusty concorde, chipped sapphire and black soot surrounding purple and hemetite Viva, scraped on with an old credit card.. do you know what?? I think she is a little obsessed with this Viva stuff!!!

 The stamps are a mixture of Wendie Rhodes  (@ Kanban Crafts) cogs and gears and Katzelkraft, clocks etc, stamped in black archival and clear ep'ed... well, that's a first, she NEVER does that technique!!

This shot shows my lighting scheme!! I have a couple of daylight lamps and an ordinary light - NO prizes for guessing which side is the latter!!! But I like the play of light on the shiny surfaces... it adds a bit more dimension... ohh get her being all arty then!!

So that's me for tonight.. must get off now and try to sleep!! But why not go over to the Stampman  Challenge blog and see my teamies' work, it's always inspiring, and then join in, cos Jill offers a great £10 voucher to spend for a lucky winner... The theme is monochrome, hence my restricted colour pallette, however, either I boobed - well THAT's nothing new!! or Lisa slightly changed the rules when she wrote it up, cos I did not know it was "white and a colour"... oh well, not making another piece cos I like these guys - perhaps "like" is a bit strong!!!

Thanks for visiting and commenting... I am really grateful for all your wonderful support...
Love and light
Frankie
xx

I shall also enter this into
Try it on Tuesday - monochrome

Wednesday, 7 September 2011

WOYWW #117 - Seeing Red!! and Ready to Swap

Someone on the wireless this morning, said there are 108 sleeps until ... well you know when!! I can't bring myself to say it... but the way this year is flying, it will be here before we know it!! And whatever happened to the summer???... two weeks today, it's my 66th birthday!!! so I KNOW the year is fleeing.

Not surprising then that another week of WOYWW has come around!!! Visit Julia, the misress of the desks if you are new to this... it's the best blog hop every week!!But to join in, you have to show your shame desk!!! So here's mine, uhggg!!!


 It's a small area you can see and I can actually fit all my bits for the tag on to it... but, to the sides of this bit, it is rather grim!!! The tag is for TIO, chosen by Helen - one of her famous, or infamous colour challenges, to use mostly red... well I DID!! starting with fired brick stain..

 I stamped with an Artemio script clear stamp, and a Stampman stamp, which is a net... one of my first ever from Jill. Next, I took a lovely mask and some wondrously red Viva Inca Gold paste... a palette knife did the trick.

 The script shows very well from under the paste, and some perfect pearls in red. add a wonderful lustre...The paste dries with great texture, which can be smeared with other stuff!!

 LONG time since I made my fab Lynne F roses - do go check out her tutorial - so out came the grunge paper and glue. Umbrella man makes an appearance, minus umbrella!!! Stamped amd ep'ed, I thnk he looks great!!!

So here they are in all their sprayed and smeared glory... so yumminess, thanks, Lynne xx....I seem to have got a lot of texture this time, too...

 Here it is then, all put together... umbrella man sporting a fetching flutterby!!! More of them hover top right corner, with fetching spinner bods!!

 Here is a closer up vision of umbrella / butterfly man, stamped, embossed and smeared with rub 'n buff and Viva Inca Gold...
 I coiled some copper wire and added it like hat pins of a different sort. I love wire, and my coily thingie makes it really easy to work with...

 The ribbon bow is made from dyed seam tape - lurrve that stuff!! - and a letter R for red swings from it...

So that's it for that... it really is VERY red, Helen!!! And so full of texture - you might know that's one of my fave things... I enjoyed this one and look forward to hearing what you all think of it...

Bird Cage Swap News
By now, you should all have received your swap partner!!! cos today is finally THE day, so take some photos and send your cage off to it's lucky recipient!! I have THOROUGHLY enjoyed organising it, and hope you will join me again for another great adventurous challenge, in the not-too-distant future!!! So we shall show and tell next week, by linking our OWN make here...

And Finally...
I offered my followers and commentors a shot at getting my tag book, from the travel set I made with the suitcase... I have done the draw and the lucky recipient is.... tada!!

Helen of Stamping by H...

So let me have your addy babe, so I can send it off to you

Well, that's about all for this week - hurrah I hear you cry!! Have a great week and thanks for coming over again ... please leave me a comment, cos I love to hear what you think... and the more you visit, the higher I jump up the rankings!!!! tee hee (gosh, but I am vain!!!)
Love and Light
Frankie
xx

Saturday, 3 September 2011

Birdcage Swap News

Well, the time is fast approaching... I hope you have yours ready. There are 26 of us in the swap and we each send to someone different than the person who sends to us... I have done the partners and I will email you your partner in the next couple of days.


I hope you have your offering ready, or almost ready, so that we can all post off as soon as possible after 7th September... When you know your partner, you will need to get their address, obviously!! Then the cat will be out of the bag- so don't let it catch your ickle birdie!!!

I would like to have a "show and tell" on 14th September -

Take a photo of your OWN birdcage, and post it here on my blog, that day... Some of us will have received ours already, and some of us won't, but we will be able to see what we will be getting!!! OOOO, it's so exciting isn't it ... want a sneaky, eaky peaky at what I am doin?? Oh, ok then, just an ickle one... shhhh!!! just don't tell my partner...


So that's all you're getting for now. I will post again about the swap on Wednesday 7th September to remind you all to send off your birdcages... but don't forget to take a picture or two of them beforehand, so we can have a linky thingie to see them all the following week...

Thanks for joining in and thanks for your support... I needed an even number for the swap to work, and had to turn down the last person who asked if it was too late...it was only this Thursday when she asked!!!... if anyone new wants to make a birdcage BEFORE next Wednesday, let me know and I will see if we can make up anymore pairs...
Love and Light
Frankie
xx

THIS SWAP IS NOW CLOSED

Wednesday, 31 August 2011

WOYWW #116 - Heavy Metal Working for TIO

Where is the year racing off to??? It is impossible to keep up, and I am hanging  on to the handle with my feet flying into thin air - you get the picture??? Now stop giggling and get set for my desk exposee!!! Not know what I mean? pop over to see the wonderful world chez Julia, where ALL will be revealed - well only very decorously and in the best possible taste!!!!

 This week, on TIO, we have 3 new Design Team members, Aj, Silvia and Lyn / Blackdragon!!! Fabulous or what??? Do please pop and see their wondrous creations here...We are starting a new round of challenges and the girls have asked to baffle inspire you with song titles, for the next few weeks... It's Elizabeth's turn to start off and she has chosen Bon Jovi, Red Roses, and is DEMANDING some metal of us!!! Always keen to oblige, I decided to do an hommage to the wonderful Lin at Yours Artfully, and use terra, ferro and stuff as well as metal embossing. The bits are out ready to start...

Here, the metal has been embossed, with the "scribbly scribbly thing" pattern in some of the diamonds, and some line and wheelie patterns... I just MUST go on a course to know when to use the mats and when not!!!! I am almost there, but not precise enough...

Like the divvie that I am, I got so carried away, I forgot to take any more photos until I was well on in the process, but basically I used my pallette knife to ladle on the terra and ferro then stamp into the wet stuff with a clean, but watery wet stamp or two...

 I used the rose harlequin set from Elusive Images, always one of my faves ( that and the butterfly harlequin) so as to fulfill Elizabeth's dream of roses and metal... This blousey flower is also cut from metal using a PaperArtsy die, with the scribbly scribbly thing on it again... I rubbed with the Vintaj sand block then added some wondrous red Viva Inca Gold paste. The centre is made from a TH metal flower and a Graphics45 button, also coloured with VIG red... absolutely yumminess!!!

This is it close up and VERY personal, what wonderful colour and texture. I am LOVING working with metal, Elizabeth!!

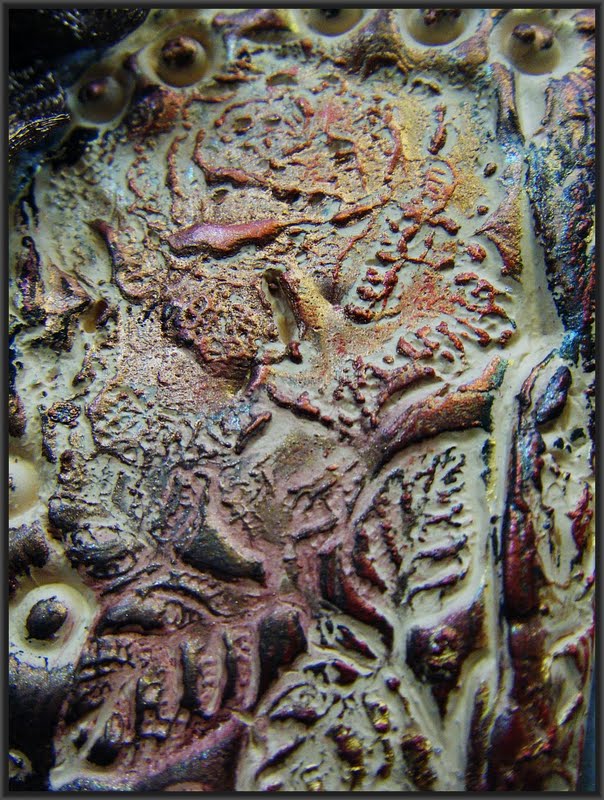
 This wonderful textured part is the small rose stamp, pressed into the wet terra, with a wet stamp, well- cleaned afterwards... the relief really shows up well when the different metallic pastes are added and a little smidgen of black acrylic paint, all gently rubbed and  smooched...

 Well here is the whole thing, head on, so you can see the way it fits together. The terra is on the right side in sahara colour, and the hematite ferro is spread on the left, where the large rose harlequin stamp was pressed, along with the writing...

 This shot shows that and the actual metal embossed piece, also smooched and rubbed with black acrylic paint and various metallic pastes... ooooo, I LOVE the texture, don't you??

Some of the texture was made using the cup end of the metal working ball tool. The bow and tie top closure of the tag is made of that wonderfully expanding metallic ribbon, in a glorious goldy brown... The tag is larger than the #8, so I could get more yummy stuff on to it. I enjoyed making it immensely, and it did not take over long, for once!! Often I phaff about and haver quaver, but I just got on and got messy and mucky... so my stamping required no ink this week, but water saved the stamps from a fate worse than death!!

Thanks for coming over today, and looking at my metal piece. I hope you have a super week and that the weather and earth a re more peaceful for you if you have been troubled... Pretty Please leave me a comment and do try to visit my wonderful TIO DreamTeam to join in with this song...
Love and light
Frankie
xx