DragonsWeb

Welcome to my blog. Please take a look around and enjoy yourself. I hope my work will give you pleasure and inspiration, but please be kind and don't use any of it as your own.

When you have looked, why not leave me a comment, as I value what followers and visitors have to say.


Then pop over to DragonsDream Tag It On and DragonsDarkerSide

Wednesday, 8 June 2011

WOYWW #105 Some Gifts and Other Stuff!!

So, after all that build up, came the big day... anyway it was all sorted and so many LOVELY people jumped in to save my disappointment... thanks everyone who offered to send a PiF so I would not be left out...

Well, my good friend Jo from Jozarty sent me one of her dangly doofars... love them, and the charms are so unusual.... thanks Jo... and for the shoulder when I was a bit down...


Then this little beauty was from Ciara, who thought she would be sending to some other person, and had to send to me... cos the original person pulled out of the day. She also sent a little card saying I could grunge it up if I wanted to!!! tee hee, as if I would... I think it's great the way it is, thanks Ciara...

So there we have it. What a great day it was and I ALMOST got round everyone... just a few I missed, so sorry to those people, and wasn't it a marathon!!?? but well worth it to see such great desks, worktops, tables and floors!!!

Now, as promised, one of the projects from the ArtsyCrafts weekend... It was made with wood and plaster, wonderful, resinous plaster, which painted up a treat.... oh those Fresco paints are a must have, they blend so well... I had a very plain border and a lovely cameo for my centre, so it looked like this finished...

 The whole thing looks really ancient and as if it has been damaged. I was on a table of basically green paints, but grunge will out, and I made it look very not green!!! tee hee...

 This little button was just about perfect from the mould. I had the merest little shaving of extra plaster to remove when I took it out.

 We used kabuka boards wrapped with tape to pour into for our borders. Mine was very precise and formal, in this Greek key style, so to age and distress it, I nibbled it with my TH scissors. The paint was applied deliberately to give this shadow effect...

My central lady was a beautiful cameo which I embedded in the centre then made ray marks with my ruler. These were then enhanced with paint and "goop" which is wonderful gold, bronze and copper Viva inca gold product!!! Fab stuff, and easy peasy to apply with finger or brush. What a lustre it added...

 Now for the PiF I made for last week... just a peek, as I will post the whole thing later on... please call back to see it...

 The cover is bound with some Claudine Hellmuth canvas, died with TH masks and colour sprays...

 It is a faux paper bag album, with tags outside and inside the pockets...the paper I used was from TH lost and found stash...

Here is a shot of one of the tags. They all have an inspirational saying... You can see the large tags inside the "bag".. Sue received it and says she likes it...

and finally a glimpse of my TIO, Simon and GM tag entry... winged things...

 Distress inks and stuff, just so enjoyed it...please look here to see more...


So there it is, yet another Wednesday, a week come and gone in a flash and we will soon be at the high point of the year. Nights draw in after that!! Freddie and I are going to Venice to tie the knot in our Handfasting ribbons very soon... I am just hoping and sending positive vibes to the Dao, to get my back better so I can walk!!! Believe it or not, it's a year and a day since my knee was done... heyho, one day I will not have any pain and I will probably promptly die of shock!!!! tee hee.

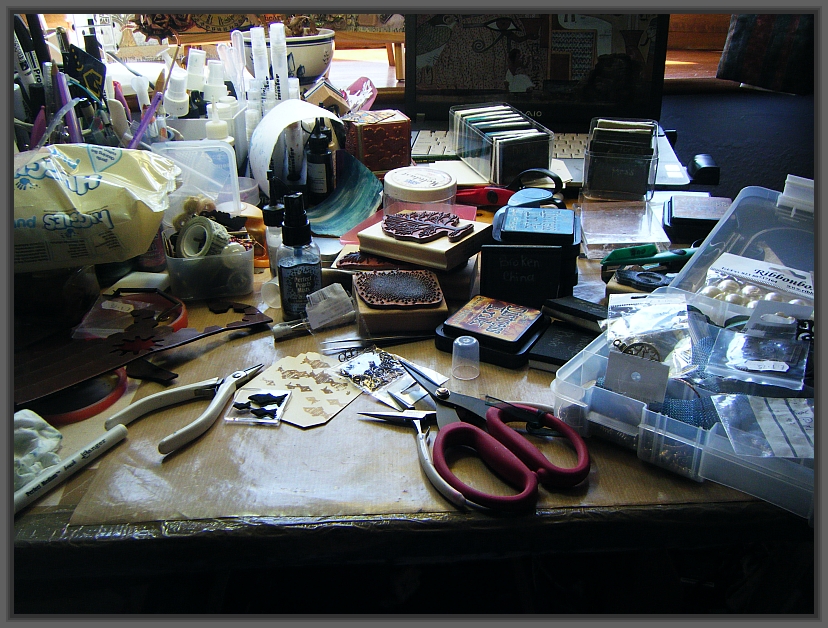
Anyhow, thanks a lot for visiting this week. You probably wonder why I have not actually included a pic of my workdesk??? Truth is, I just can't darnwell find it under a mountain of STUFF!!!! Oh well, one day I will also be tidy , with probably the same fate as above!!! tee hee... visit the wonderful Julia, if you are from another planet and don't know about WOYWW...

Thanks for looking and please do leave a comment, as I blossom hearing what you have to say...
Love and Light
Frankie
xx

Tuesday, 7 June 2011

Grungy Monday, Simon Says Stamp and Show a Tag + TIO

Show a tag!!!! What could be more up my street???? And distress inks!!!!! gobsmackingly great idea, so I could not resist of course... Still having a problem with my back. It is improving slowly but I have combined my tag initially, for 3 challenges... Grungy Monday - ink-o-rama, Simon Says Stamp and Show - a tag, and TIO - winged things... because I still can't sit to do too much for too long...


 So, distress inks?? Yes please, just about every time... I used milled lavender, victorian velvet, dusty concord and a touch of chipped sapphire...  The black is done in black archieval and embossed in clear ep for a bit of texture.

 Along the left hand side is a strip of lovely crocheted lace, dipped in a watery mixture of milled lavender.
The thin ribbon is also treated in the same way. The beads are hand made, but not with distress inks!!! tee hee...

Tim Holtz devised these wonderful inks, and we have him to thank for the wonderment they are to use!!! Why not pop along and have a look at his inspirational site...

 The background is made from smooching the tag through a mix on my sheet, then overprinting various stamps in the different colours of the smooch... gosh, it never fails does it??? These inks just work... The butterflies and moths are from TH papillon sheet too.

 This large butterfly is really gorgeous to use, printed in black over shimmery card coated with perfect pearls - yummy!!!


 I also painted with a brush and water - another way to use these brilliant inks...

I finally got a TH tattered florals die, and used it here to make these flowers. I have loved it for a long while, but it was sold out everywhere until recently... anyway, here now, hurrah!!! The centre is an accoutrement of TH too, altered a bit with London nights paint from PaperArtsy - another new absolute fave for their wonderful matte, chalky finish.

I would also like to add this tag to the Play Date Cafe challenge #85 this week, which incorporates the very colours I have used as you can see below


So thanks for coming over and having a look, and I ask you to leave me a comment please, as I LOVE to hear what you think of what I do...
Love and light
Frankie
xx

Thursday, 2 June 2011

Stamp Addicts 6 DT Pieces

Ok... finally getting round to putting these up... been so 1) busy 2) in pain to  get to it!!! I really enjoyed the set of stamps I got from Stamp Addicts, for my first DT call... and I saw 3 of my cards on the show, so I was very pleased...

 This was a brown and cream pallette, using some kraft glassine paper as a mount and for the rosette, which is from the die by Tim Holtz.. lovin it, as you know if you follow my blog...

 This one caused a little conversation on the show... it is an unusual finish, but was actually a happy accident. I used vintage photo distress ink first off and it did not show up very much, so I re-stamped with archival black over the top, and then used a fine clear ep on the top... the distress inks are actually always unstable, and it moved a bit as I stamped again... the finish is very distressed and is probably not repeatable!!

 I masked this one so I could stamp several different  faces of the judikins foliage cube, to make the garden, after smooshing the greens distress inks on my craft mat...

 I have just had a new stash of on the edge dies, and I used the ornate one on both ends of the paper and card to make these shapes.....

Same technique here with a different die. This one was made to look like regency, hence the stripes... The background paper is from PaperArtsy, called Thornton Hall.

These little chaps are off fishing, after being stamped in black, under angelique fibres and film, ironed on with a bit of parchment to protect from burning...love this technique... am looking forward to doing some marbling and stamping these lovely silhouette stamps again...

Thanks for looking, and leaving your lovely comments
Love and light
Frankie
xx

Wednesday, 1 June 2011

WOYWW #104 - Grungy Monday #9 & TIO #81 - Time Piece

Well here we are for a VERY special WOYWW... if you don't know what I mean, please click here to be whisked off on a bloggery carpet to Julia's blog, the Stamping Ground, to find out!!! This time, it's her 2nd anniversary, and we are giving and receiving gifts ... all, very exciting. I can't wait to see who I send to and who sends to me - it will be so interesting to find out what little gem some wonderful person has made for me, and to find out if the person who gets my little thingy likes what I have made ... Oh I DO hope so... bit nervous!!!

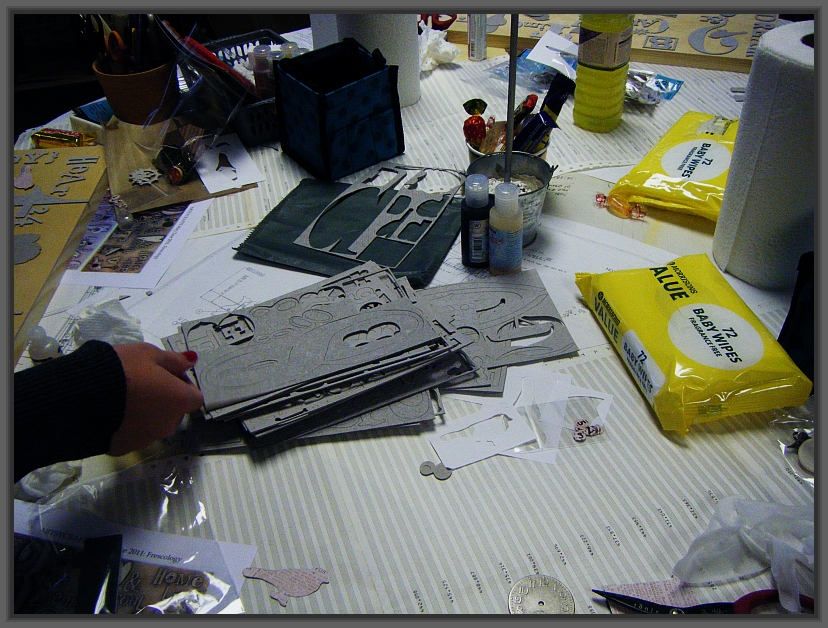
So I am cheating with my desk this week... I was off for a VERY cratfy weekend in Milton Keynes. It's that desk but I can't show you what we made, or I will have to kill you!!! tee hee - but here is a teency weency preview, because there is another course in a couple of weeks' time in Warrington...


 So there we are for the projects last weekend... this final picture is from the last piece we made... eventually it will make sense!!

The following photos are from my TIO / Grungy Monday entry, Time Piece. For TIO, we have to dream in time, and for Grungy Monday, over on Studio L3, with Linda Ledbetter, the challenge is to use a Tim technique from a Christmas tag.

 I have used an arts parts watch from Wendy Vecchi and a metal and kraft glassine paper flower.

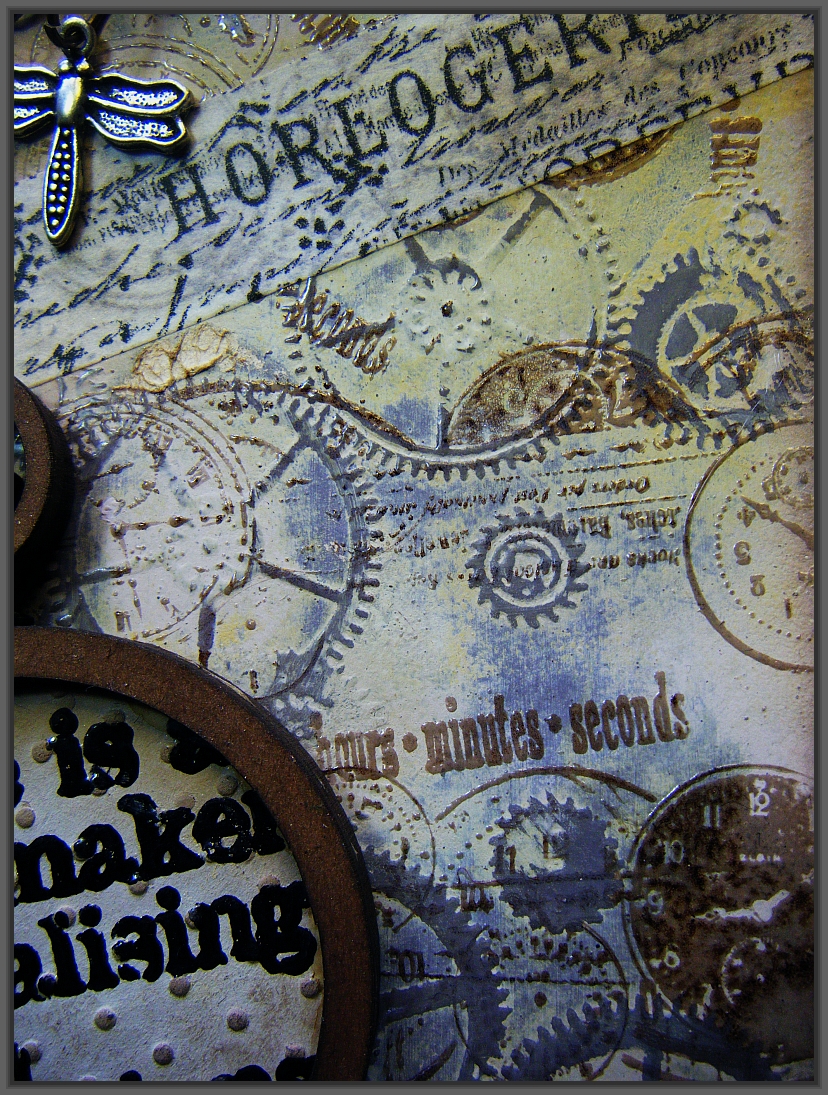
 This is a close up of the Tim shabby chic technique. I used my new Fresco paints from PaperArtsy, London night, haystack, vintage lace, and honeydew. I painted the tag in London night all over, then stamped some PaperArtsy cogs and clocks and set with clear ep. I splooched the other colours all over the tag, then rubbed some of it off to expose the dark cogs and clocks... the whole background looks very shabby... really interesting. I stamped a Crafty Individuals clocks stamp all over in vintage photo and set with clear ep again for even more texture...

 The strip of Tim Holtz tape was chosen for the word across it - horlogerie means clockwork/ time mechanism... just right!! You can see those rubbed off cogs close up here...

 Here is the flower and the gold piping and vintage lace...

 
 And this is the full view of the whole tag. It is a clever saying, from PaperArtsy again, and the clock set behind the art part, is from Tim's lost and found paper stash.

 
The full 3D effect is shown on this picture, with a great view of that lovely lace...


So there we have it... I am loving the colour and these art part clocks... it's the second week that I have used one in a piece... this time it was coloured with vintage photo ink to darken it a little. The whole thing is finished of with a Tim Holtz swivel clasp and a pretty ickle dragonfly... Why not pop over to my DragonsDream Tag It On blog to see what fabulous pieces my team has created, and also have a look at the Grungy Monday challenge, it's really fun and always good to re-visit Tim's ideas.

Thanks for sticking with it this far!!! I am pleased you came to look and stayed and left a comment - I LOVE them, unashamedly!!!!!
Love and Light
Frankie
xx

PS...
Hello again everyone... I have an apology to make. I was disappointed at having a VIRTUAL PiF when I thought we were all making an ACTUAL thing... so I contacted my sender to say thanks, but I would not need to take the "class" she was offering... I KNOW ... I am a bad person... I just hoped I would get a REAL handmade thing to keep... anyway, she is now offended, and has withdrawn, and I am sorry, so now I don't have a PiF gift, and I have made her unhappy... SORRY PARDON to her and everyone... especially on this nice day.. boo hoo...

Wednesday, 25 May 2011

TIO #80 - My Fishy Piece

 This is my dream for the TIO fishy tag this week, set by Janet... it is very simple, but really good fun...Had to be because my back is hurt from coughing!!! A back brace is not very condusive to crafting!!!

 I smooched the white tag through lines of different blue distress inks - just for a change!!! Then dried and dipped again till I was happy with the bubbly effect...  vintage photo smooched at the base, made the rocky bits. The plants were stamped in the same colours...

 The dragonfly is so beautiful, with a sparkly head. I sprinkled clear ep round all the edges of the tag.

 I wanted a word - lots of people say that to me frequently, tee hee!!! - but not heavy letters, as I wanted to keep that bubbly, dreamy effect so I placed the letters across the piece, then sprayed with blue haze perfect pearl mist - gotta love that stuff!! - the effect was just as I wanted, with a little help taking off some of the inks underneath the letters.

The fishies were stamped from a homemade stamp - from foam, backed with the redline tape, like I made the Tim Holtz die stamps a couple of weeks ago... It was fun making the ickle trio, that could be reversed in order to look different, like a shoal!! I finished off the piece with a fishy charm, aged with black and pool acrylic paint, rubbed off to leave bits in the indentations...

Well that's it for this one... hope you like it and have enjoyed your visit enough to leave me a comment or two. That would please me no end... Thanks for coming.
Love and Light
Frankie
xx

WOYWW #103 and TIO #80 - Fishy Tag

Oh my, this week has gone WAY too fast, and my ickle bug is still being a pain - literally!! Apparently I have strained and damaged ligaments in my back with all that wretching and coughing, so I am laid up and in a back brace!!! Boo hoo... However, I have managed a bit of work this week and want to share my desk with you... follow this magic link to see Julia, if you don't know what I mean!!

 So here is the main picture of my desk this week, working on a tag for TIO, challenged by Janet this time, to do something with a fishy dream... All my blue distress inks - what a surprise - and some great stamps from Stamp Addicts.

 Here is one of my jewellery boxes of tricks!! Beads and other findings here, ready for the tag and another project I will share at the end of this page!!! - what a teaser!!

 So I needed a fishy stamp, and I don't possess one - drawers and drawers full of stamps and no fish??? oh well... and I decided to make my own... from foam. You can see the printing practice here, where I made marks in the foam with one of my TSS wheels...

 You remember me making the Tim Holtz die stamps from foam? Well I decided to try it again but freestyle. Above, you can see the black foam, covered in the redline tape.

 This is a sneaky detail from the finished tag then... all dreamy and watery, with a dragonfly hovering ready to pounce into the water to lay its eggs on my weed... rambling again Gaywood!!! get on with it... Come back later to see the finished thing or pop over to the TIO blog to see what my whole team has produced - you won't be sorry, there is so much inspiration...

And to finish, I am letting you see the beginnings of my piece for Simon Says Stamp and Show Wendy Vecchi... That stamp from Tim Holtz was for the wings to my art part watch, but again, you will have to come back to see how I finished it all off...

Thanks for looking and commenting... I really appreciate that you come and take an interest in my work... have a great week. When I see you next, I will have done my wonderful weekend at ArtsyCrafts.. yippee!!
Love and light
Frankie
xx

Simon Says Stamp and Show - some Wendy Vecchi Style

 So Wendy Vecchi - Studio 490... love her work and that of others who use her work and style... so this challenge was timely for me... I recently bought my first art parts and clearly for art sheets, and this was a good excuse to have a go with stuff...

 I feel one needs to get the signature bits of a style, and for Wendy-work it seems to be a recipe of :-
- dotty paper
- butterfly
- spectacular flower
- squared/graph paper
- an art part or three
- neutral colour scheme (frequently anyway)
- odd-ball theme/idea

 So here is a close-up of my version of spectacular flower, courtesy of the lovely Lin at Yours Artfully. She has fantastic tutorials on her blog, so check it out. I have wanted to work with metal for a long while and I fianlly did a class with her at her shop, L.B. Crafts.

These petals are from PaperArtsy dies. This metal started out bronzy coloured then I worked it with the tools. The pointy petals are done with what Lin calls the "scribbly scribbly" technique - literally scribble with a pointy tool... I painted with black then pool acrylic paint, then swiped off most of it, to leave the channels of the pattern etched in colour... that centre is a button/brad from Graphic 45 - total yumminess, introduced to me by the wonderful Laura Denison at The Paper Trail... she is a desginer for them, and makes the most amazing creations, including jewellery using these babies!!! Take a look, she's awsome!!


 Here is the mandatory dotty butterfly, here made from TH kraft paper put through the Vagabond in a swiss dots embossing folder, then coloured and dots enhanced. I used some homemade coiled wire for it's body and antennae. The arful tag from TH is coloured in the same way as the flower, attached with a swivel clip, hanging from a hitch thingy... the flowers are creamy Prima, inked and misted a very lot...

 TH sprockets and gears and spinners contribute to the steampunky flavour of the piece, as does the beautiful Vintaj piece in the centre of the art part pocket watch...


The wings are stamped from a birdie, by TH then cut out and aged with vintage photo and broken china inkiness. It's all mounted on a little frame, which I left unpainted cos the colour was just right. The leathery-look backer is a piece of crumpled/ironed kraft glassine paper - actally there is a ring of petals in the flower made from that too... wonderful stuff!!

So, I hear you cry... too much TH and not enough WV!!! However, when you listen to Wendy demo, or you read her blog, you realise SHE uses a lot of his inkiness and idea-ology too, cos they work for the same companies, and they admire each others' work... so it must be ok for me then!!! Whatever, I really enjoyed making it and hope it fits the bill over at SSSS, as I love their challenges and the high standard of work submitted there...

Thanks for looking, again, and for leaving your fab comments - I love 'em and want 'em quite shamelessly!!! tee hee!!!
Love and Light
Frankie
xx